Installation on Dailyrazor
Dailyrazor (https://www.dailyrazor.com) uses the
control panel provided by Plesk, which is commonly
available on Windows-based hosting providers. The installation instructions below
can also apply to other providers using Plesk control
panel, if the needed permissions are allowed.
To
Install Activation Server on Dailyrazor
1. From your ElecKey folder below, zip all files to a zip file (e.g.
Manager.zip). \ACTIVATIONSERVER\PRECOMPILEDWEB\MANAGER
2. Login to Dailyrazor
control panel on your server.
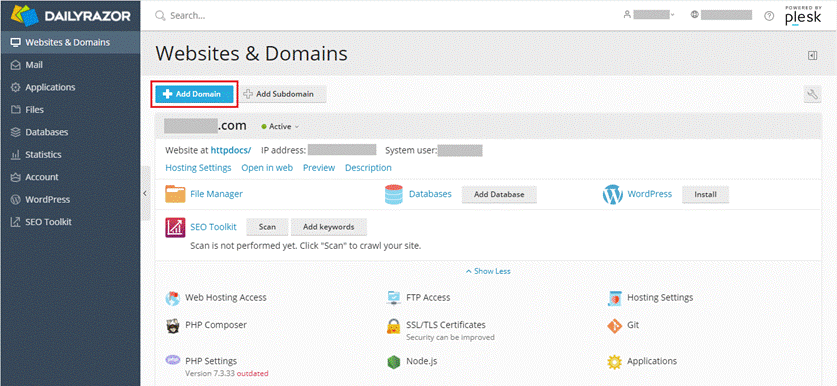
3. In case you have not yet
created a domain name on your server, on the Websites & Domains
page, click the Add Domain button to create a domain name.
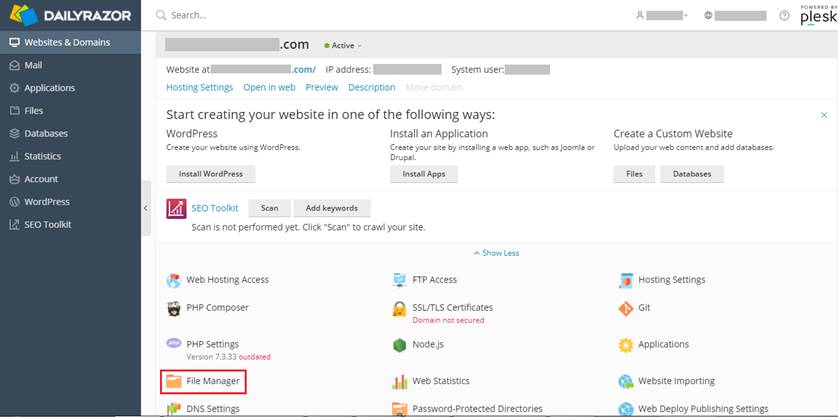
4. On the Websites &
Domains page, go to your domain pane. Then, click the File Manager
icon.
5. On the File Manager
page, click the + icon, and click the Upload File menu to upload
the file Manager.zip to the folder.

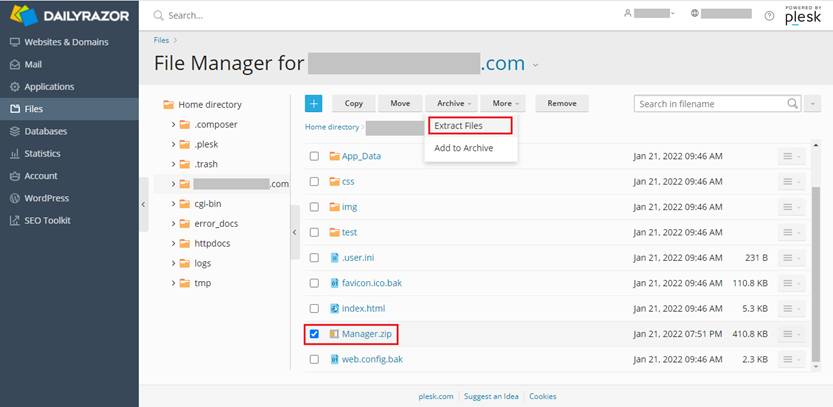
6. On the File Manager
page, enable the checkbox next to Manager.zip. Then, click the Archive
button and the Extract Files menu.
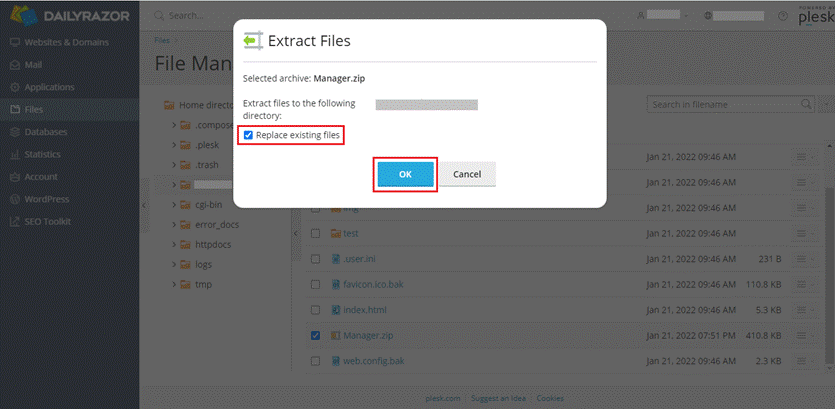
7. In the Extract Files
window, enable the Replace existing files checkbox. Then, click the OK
button. Prior to proceeding, you may backup your files in the specified
directory if you still need them.
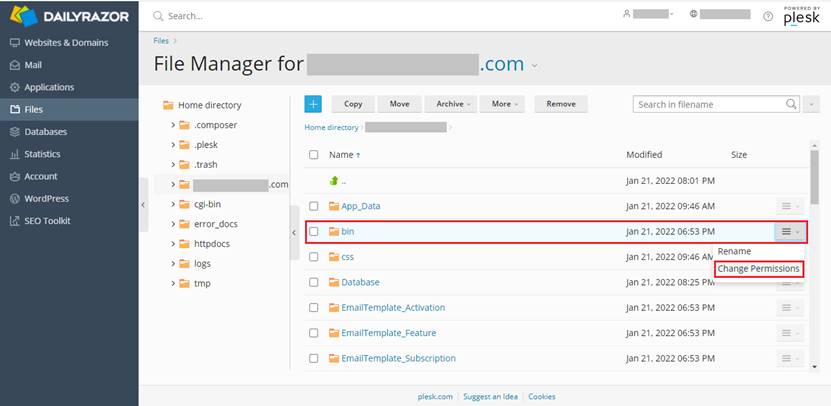
8. On the File Manager page,
click the 3-bar menu icon for the bin folder on the right. Then, click
the Change Permissions menu.
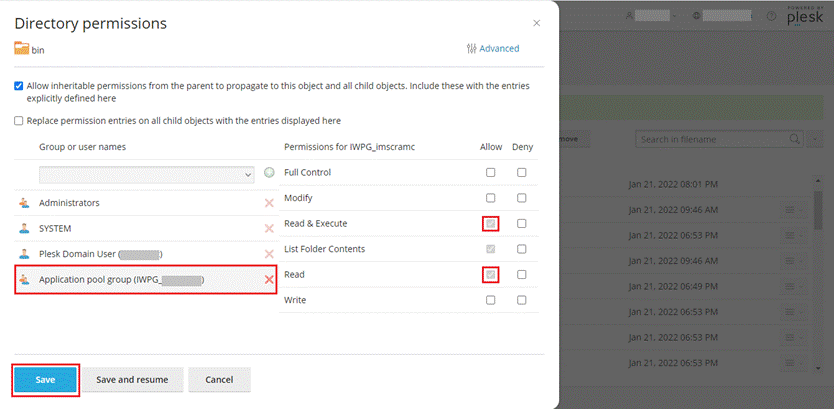
9. In the Directory
permissions window, select Application pool group (IWPG_<name>).
Then, enable the checkboxes to allow Read & Execute and Read,
and click the Save button.
10. On the File Manager
page, click the 3-bar menu icon for the Database folder on the right.
Then, click the Change Permissions menu.
11. In the Directory
permissions window, select Application pool group (IWPG_<name>).
Then, enable the checkboxes to allow Read and Write, and click
the Save button.
12. On the File Manager
page, click the 3-bar menu icon for the Exported folder on the right.
Then, click the Change Permissions menu.
13. In the Directory
permissions window, select Application pool group (IWPG_<name>).
Then, enable the checkboxes to allow Modify, Read, and Write,
and click the Save button.
14. You can now test the
Activation Server. Open a web browser and enter the URL: http://yourdomain/activationmanager.aspx.
See Also
·
Configuring Activation
Server Settings
·
Installation on Windows
IIS Server
·
Installation on Shared Hosting
Server